Testing a drive shaft for a Kia is a crucial process that ensures the smooth operation and safety of the vehicle. As a trusted drive shaft for Kia supplier, we understand the significance of proper testing procedures. In this blog, we'll delve into the step - by - step process of testing a Kia drive shaft, and also share some insights on what to look for during the test.
Pre - test Preparation
Before you start testing the drive shaft, it's essential to gather the necessary tools. You'll need a jack, jack stands, a torque wrench, a pry bar, and a dial indicator. Safety should always be your top priority. Make sure the vehicle is parked on a flat, stable surface, and engage the parking brake. Chock the wheels to prevent any accidental movement.

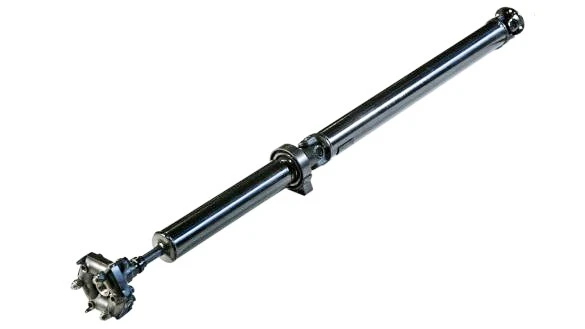
First, visually inspect the drive shaft. Look for any signs of physical damage such as cracks, dents, or excessive corrosion. A damaged drive shaft can cause vibrations, noise, and even lead to a complete failure while driving. Check the universal joints (U - joints) for any play. You can do this by grabbing the drive shaft near the U - joint and trying to move it up and down or side to side. If there is significant play, it may indicate worn U - joints.
Testing the Balance of the Drive Shaft
One of the most important aspects of drive shaft testing is checking its balance. An unbalanced drive shaft can cause severe vibrations, especially at high speeds. To test the balance, you can use a dial indicator.
- Jack up the vehicle and secure it on jack stands. Make sure the drive shaft is accessible.
- Rotate the drive shaft slowly by hand. Place the dial indicator on the drive shaft at different points along its length. As you rotate the shaft, the dial indicator will show any variations in the surface. A balanced drive shaft should have minimal variations.
- If the readings on the dial indicator show significant variations, it means the drive shaft is unbalanced. In this case, you may need to have the drive shaft re - balanced. This can be done by a professional drive shaft service center.
Checking the U - joints
The U - joints are critical components of the drive shaft. They allow the drive shaft to flex as the suspension moves. To test the U - joints:
- Remove the drive shaft from the vehicle. This usually involves removing the bolts that connect the drive shaft to the differential and the transmission.
- Once the drive shaft is removed, grasp each U - joint cap and try to move it axially (in and out). There should be very little to no movement. If there is excessive movement, the U - joint is likely worn and needs to be replaced.
- Check the U - joint for any signs of binding. You can do this by rotating the U - joint by hand. It should rotate smoothly without any resistance or clicking noises. If you feel any binding or hear clicking, the U - joint is damaged.
Inspecting the CV Joints (if applicable)
Some Kia models may have constant velocity (CV) joints instead of or in addition to U - joints. CV joints are used to transfer power at a constant speed while allowing for a greater range of motion.
- Visually inspect the CV joint boots. These boots are made of rubber and are designed to keep dirt and moisture out of the CV joint. If the boots are torn or damaged, dirt and moisture can enter the CV joint, causing it to wear prematurely.
- Check the CV joint for any play. Similar to the U - joint test, try to move the CV joint axially and rotate it. Excessive play or rough rotation indicates a worn CV joint.
Torque Testing
After you have inspected and potentially replaced any components of the drive shaft, it's important to ensure that all the bolts are tightened to the correct torque specifications. Use a torque wrench to tighten the bolts that connect the drive shaft to the differential and the transmission. Refer to the Kia vehicle's service manual for the exact torque values.
Re - installing and Final Checks
Once you have completed all the tests and made any necessary repairs or replacements, re - install the drive shaft. Make sure all the connections are secure and the bolts are tightened to the correct torque.
Lower the vehicle from the jack stands and start the engine. Listen for any unusual noises coming from the drive shaft area. Take the vehicle for a test drive. Pay attention to any vibrations, especially at different speeds. If you notice any issues, such as vibrations or noises, stop the vehicle and re - check the drive shaft.
Related Products
As a drive shaft for Kia supplier, we also offer a wide range of other automotive parts. For example, if you are looking for a cabin filter, you can check out our CABIN FILTER A9408350047. We also have Drive Shaft for Mazda for those who own Mazda vehicles. And if you need a specific drive shaft like the Drive Shaft 2105 - 2200012, we can provide it.
Contact for Purchase
If you are in the market for a high - quality drive shaft for your Kia or any other automotive parts, we are here to assist you. Our team of experts can provide you with detailed information about our products and help you find the right part for your vehicle. Whether you are a professional mechanic or a DIY enthusiast, we have the products and knowledge to meet your needs. Contact us today to start the purchasing process and ensure the optimal performance of your Kia.
References
- Kia Vehicle Service Manuals
- Automotive Repair and Maintenance Textbooks
- Industry Standards for Drive Shaft Testing


